Tutorials
Did you know you could download free 3D illustrations on IconScout and customize them in Blender? It’s easy, even if you’re new to 3D – here’s how.
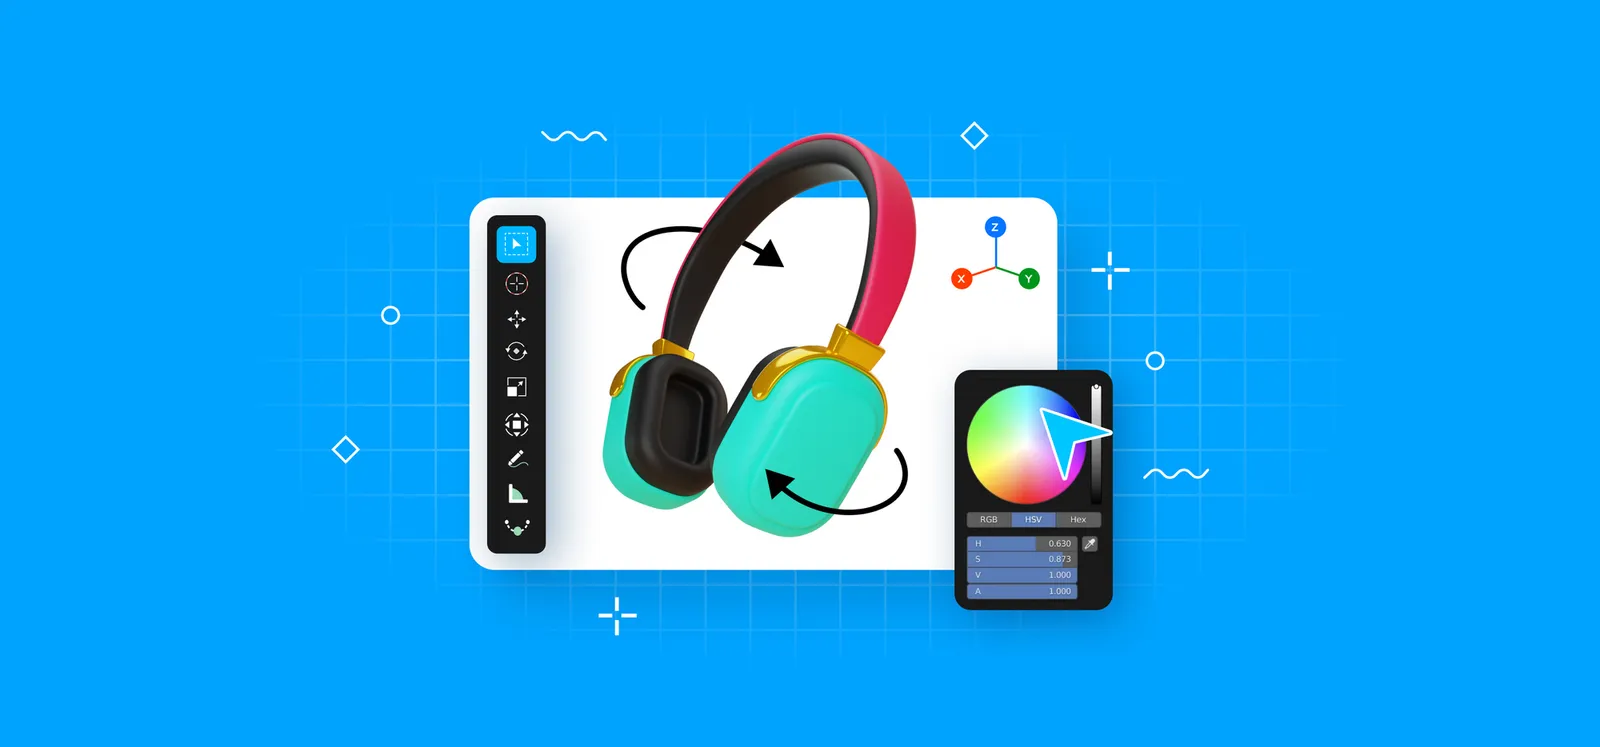
At IconScout, you don’t just get tons of free 3D illustrations – you get tons of customizable 3D illustrations. Many 3D assets in our library can be downloaded as BLEND files. You can open these files in Blender and customize colors and more. This means getting 3D illustrations that fit your brand and design aesthetic.
You don’t need to be a Blender expert to edit these files, either. In this beginner-friendly tutorial, you’ll learn how to:
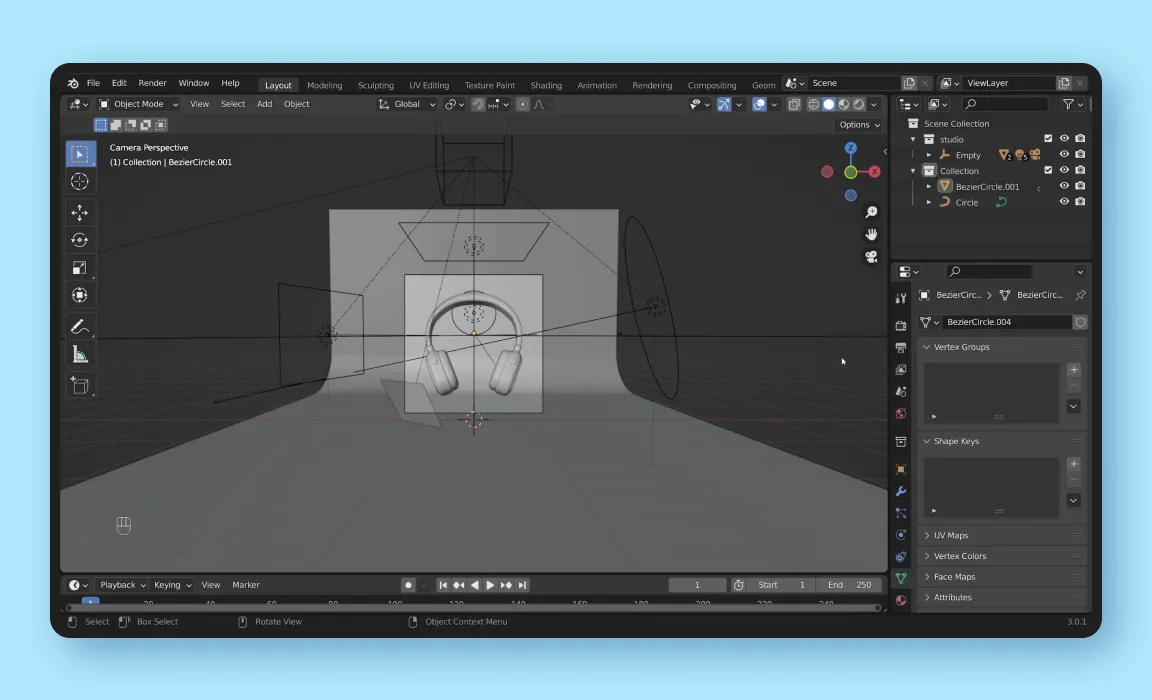
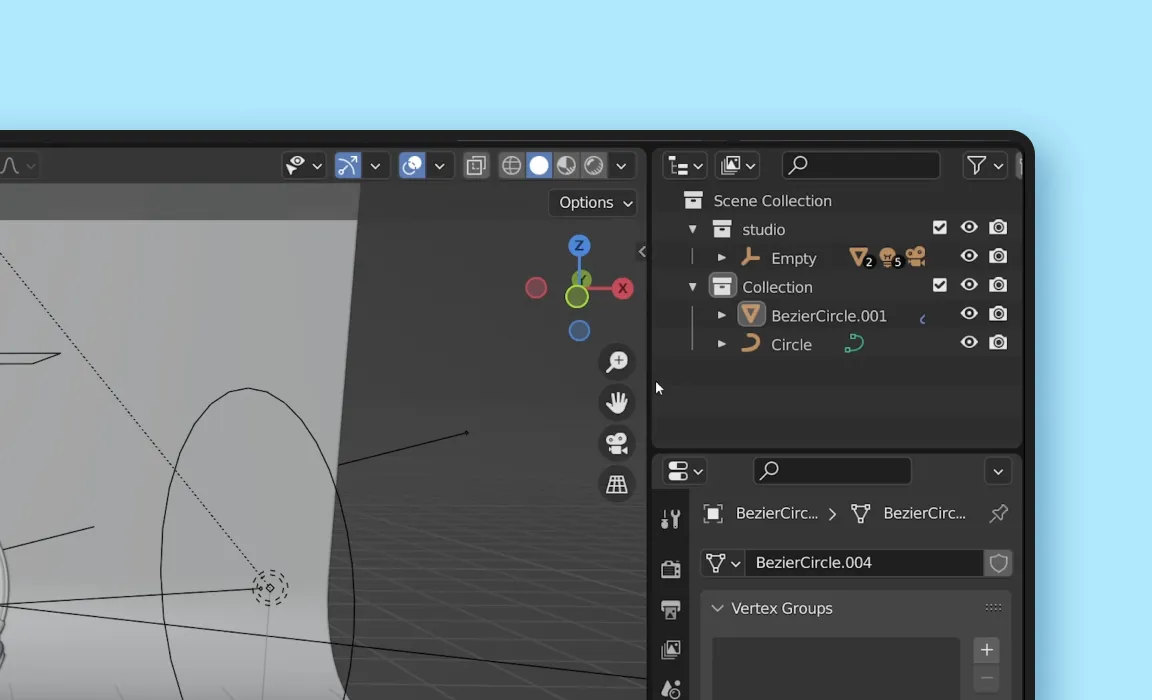
You should see your Blender scene appear. What you’re seeing right now is called the viewport – this is a window that lets you see everything in your Blender scene.
You’ll see a square appear in the middle of the viewport. This represents what your camera sees. When you render an image from the scene, it will be rendered from the camera’s point of view. To get out of the camera view, you can simply move around in the viewport.
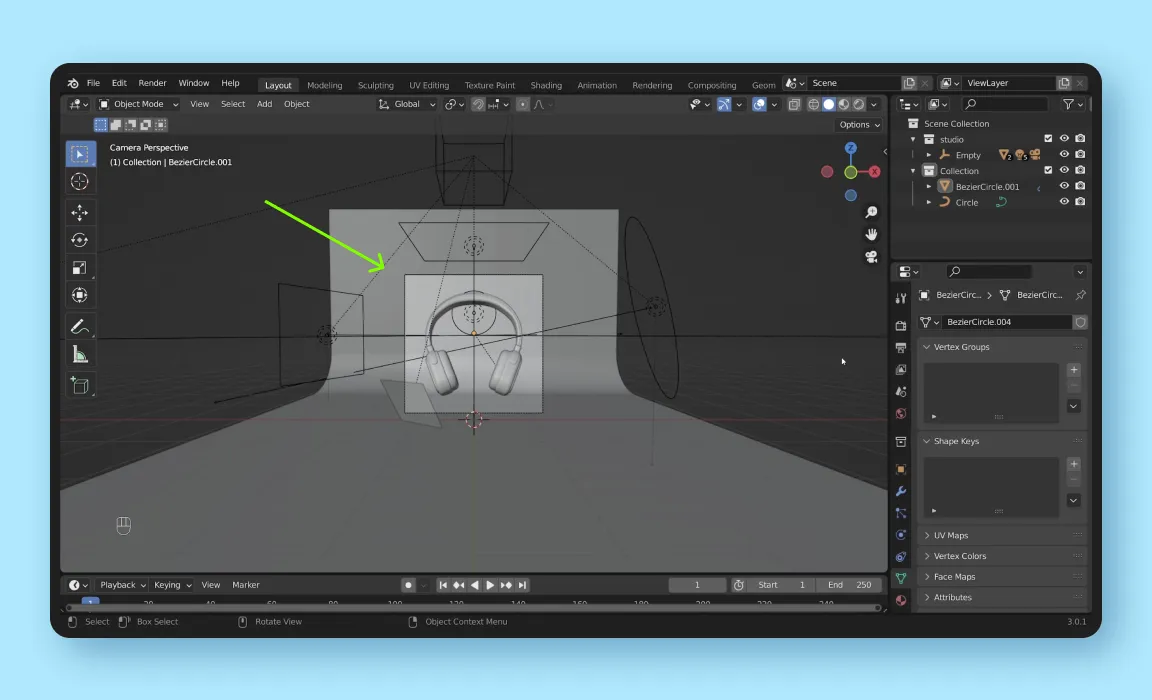
You can move around by using the Navigation Gizmo on the right of the viewport:
You can also use these mouse shortcuts:
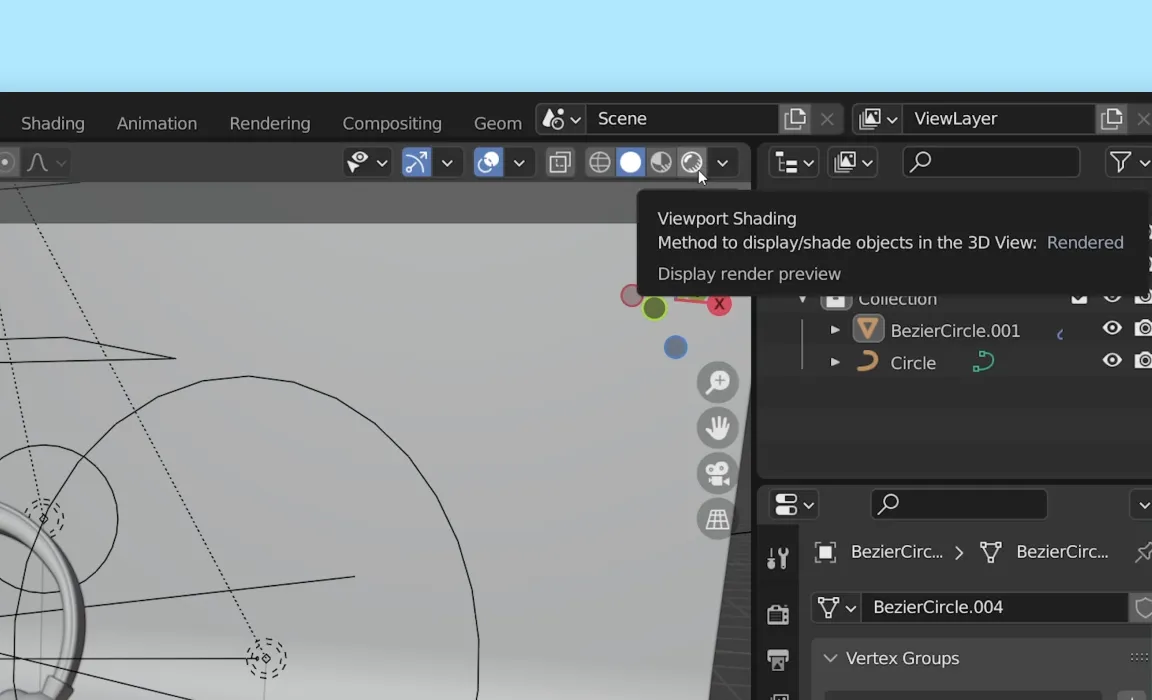
At this point, you may be wondering, why is everything in gray? That’s because your viewport shading setting is set to solid. To view colors, you’ll have to change the viewport shading to rendered.
To do so, just go to the top right corner of your viewport, and click the last icon. This shows you the rendered view – in other words, what your asset will look like look once it’s rendered and exported.
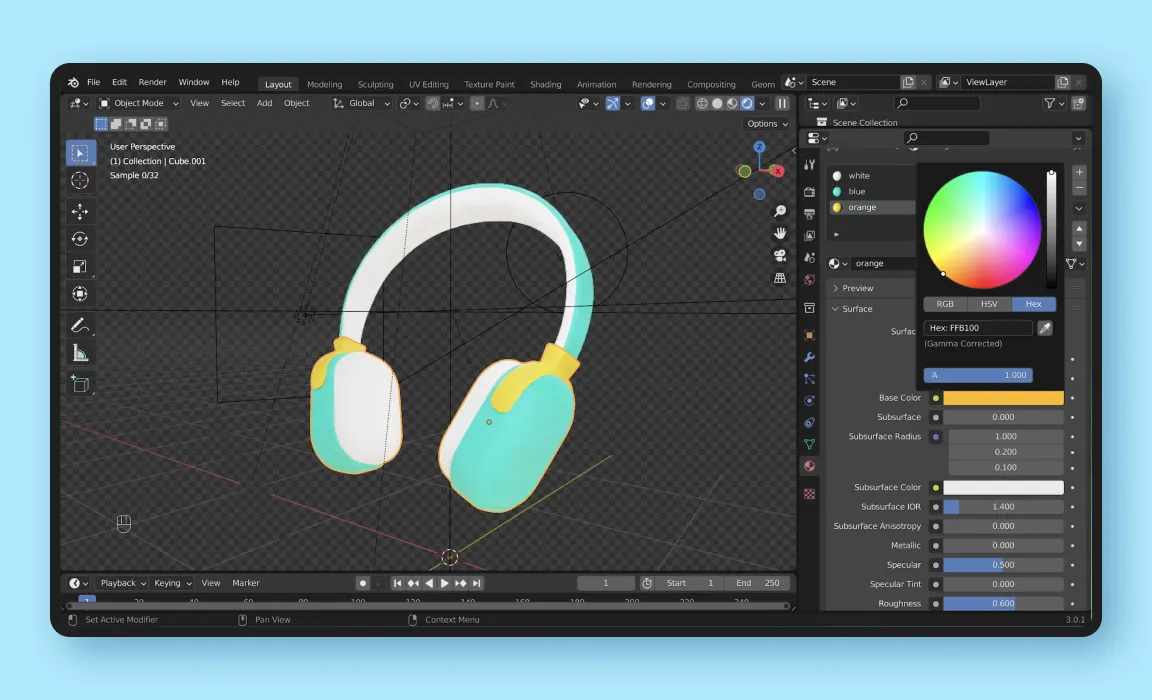
We’re finally ready to change the colors of these headphones.
You’ll see all the colors and different materials that are being applied to the asset.
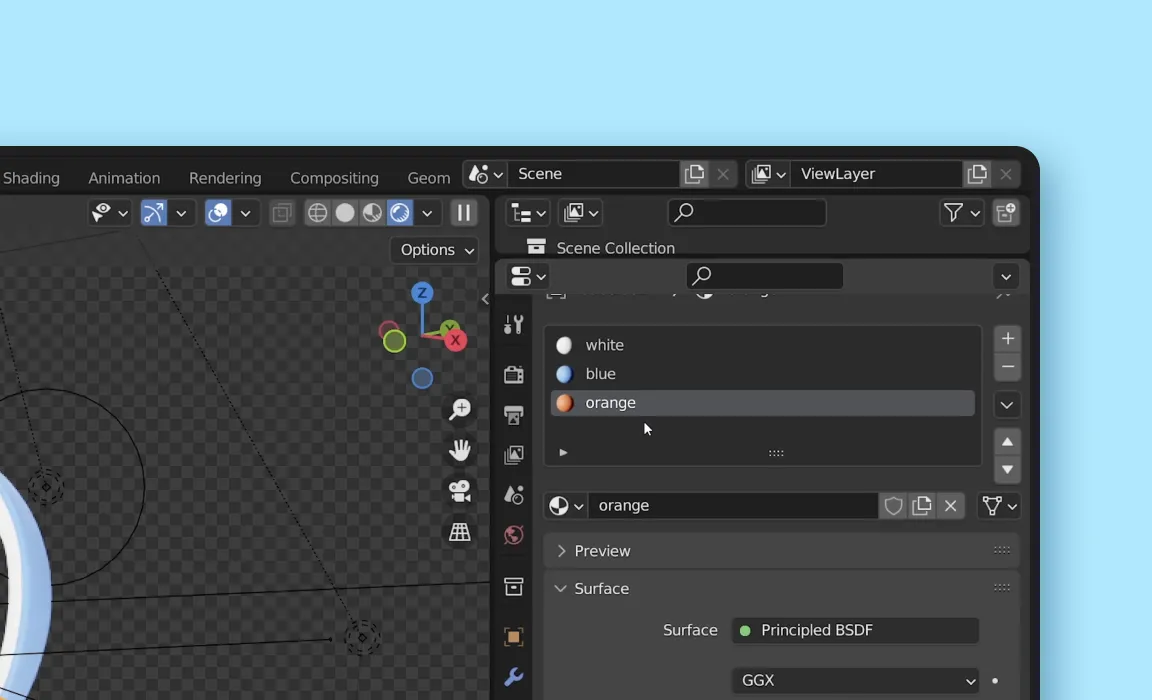
Let’s change the blue and orange colors.
What if you wanted to change only certain parts of the object? Let’s say you want to change the color of the headphone band. If you select the headphone band and try to change its color, you’ll see that you’ll end up changing the colors of both the band and the ear cups.
This is because the material of these two parts are linked. To change the color of the just the headphone band, you’ll have to unlink its material.
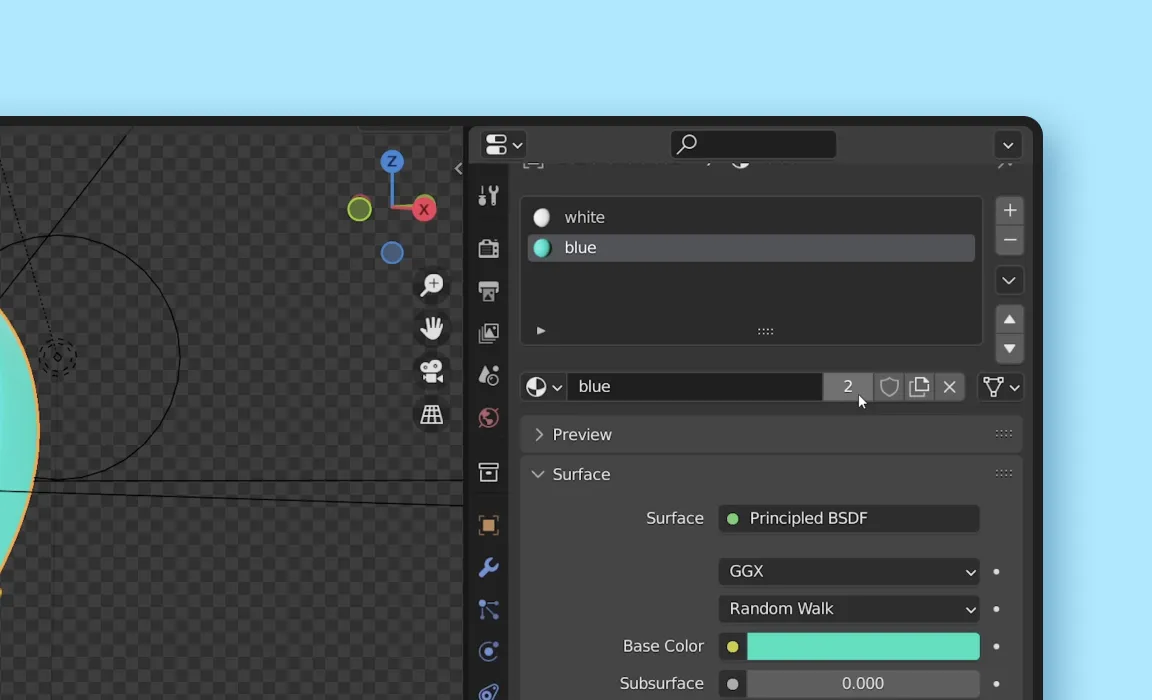
Your material will now be renamed to blue.001, as it’s now considered a new material. We can rename it to something more memorable, such as headband.
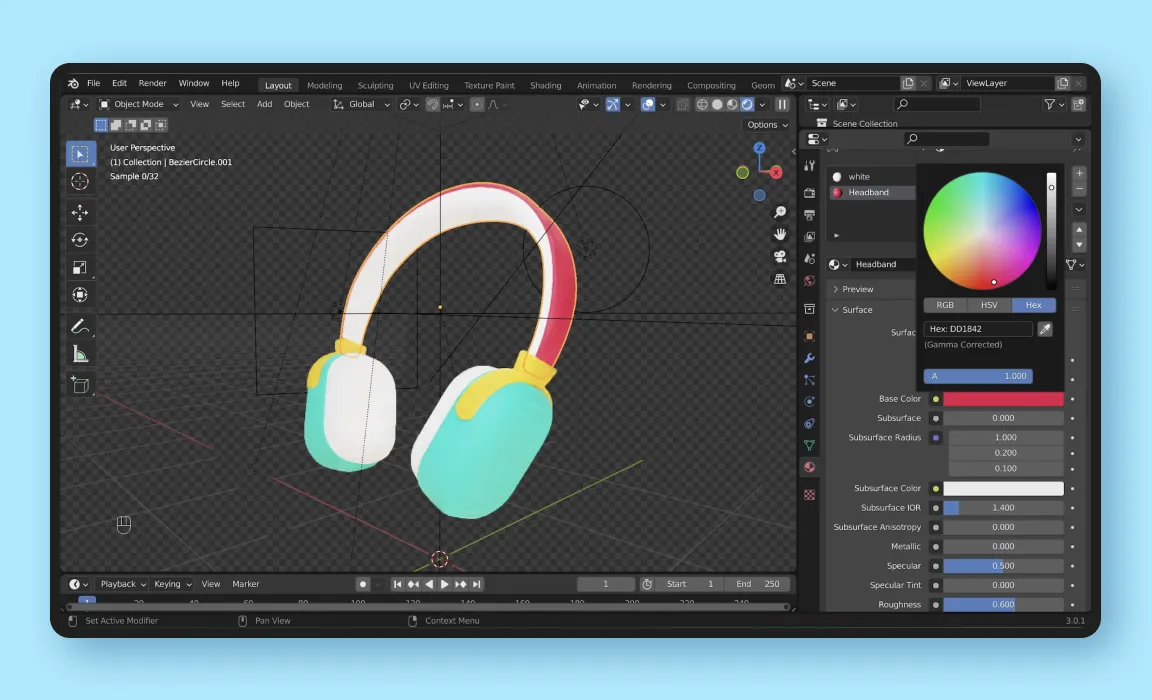
Now you can change the color of the headband, without affecting the color of the ear cups. We’ll change it to #DD1842.
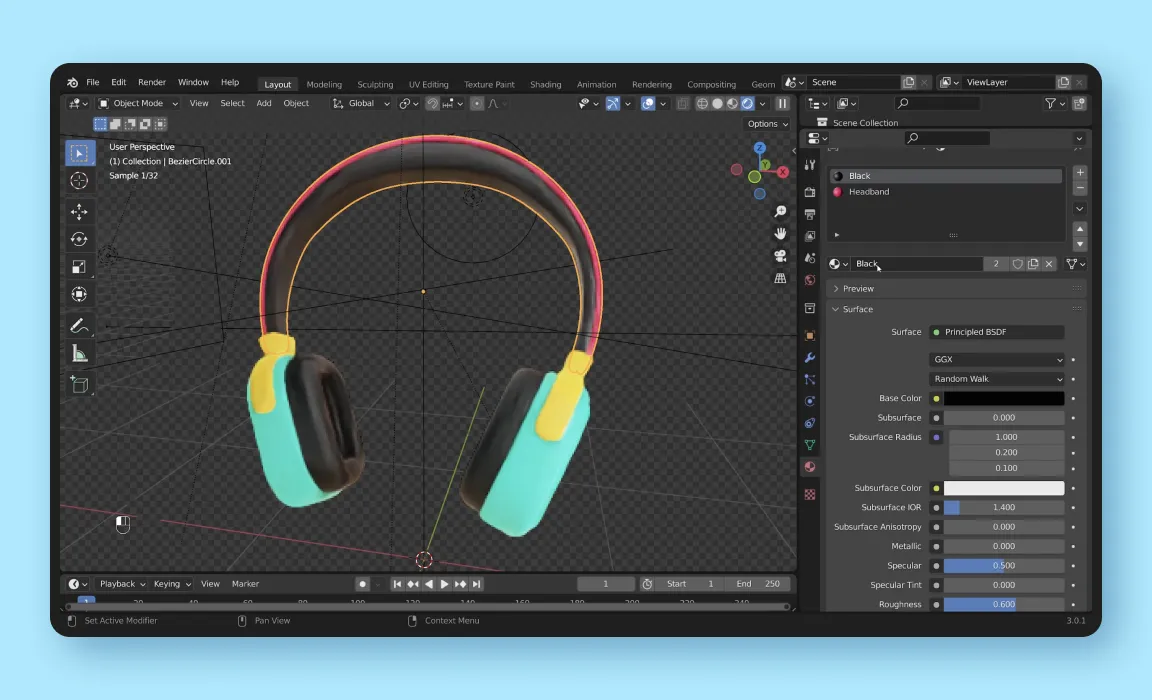
Let’s make another color change. Click on the white part of the headphones, and change the base color to black, or #000000. We’ll change the name of the material to black as well. This should fit our new color scheme a bit better.
You can change more than just the color of your asset. You can also set how shiny or glossy you want it to look.
A lower roughness value will produce a glossier surface, while a higher metallic value will produce a shiner or more metallic surface. For instance, if we could emulate a glossy gold material for the part connecting the band and ear cups by giving it a low roughness value of 0.113, and a high metallic value of 0.787.
You can also experiment with the other values in this panel to see how they’ll affect your asset.

What if you’re happy with your colors, but want to change the angle it’s rendered in? Try moving around in your viewport and rerendering the image – you’ll still get the same render, from the same angle. That’s because you haven’t changed the camera angle, which determines how your render will appear.
So here’s how to change your camera angles to get the perfect shot.
To check your current camera angle in the viewport, just click on the camera icon in the Navigation Gizmo.
This is what our current camera angle looks like. And if you remember, this is exactly what our previous render looked like as well. To get out of this view, you could move around in your viewport or just click on the same icon again. You can also do this by hitting 0 on your numpad keyboard.
This will allow you to toggle between your camera and your perspective view. If you are unable to view your camera angle by hitting 0, or don’t have a numpad keyboard, then you’ll need to set up your viewport shortcuts in the next step.
Your fancy new shortcuts are now ready! Here’s how to use them:
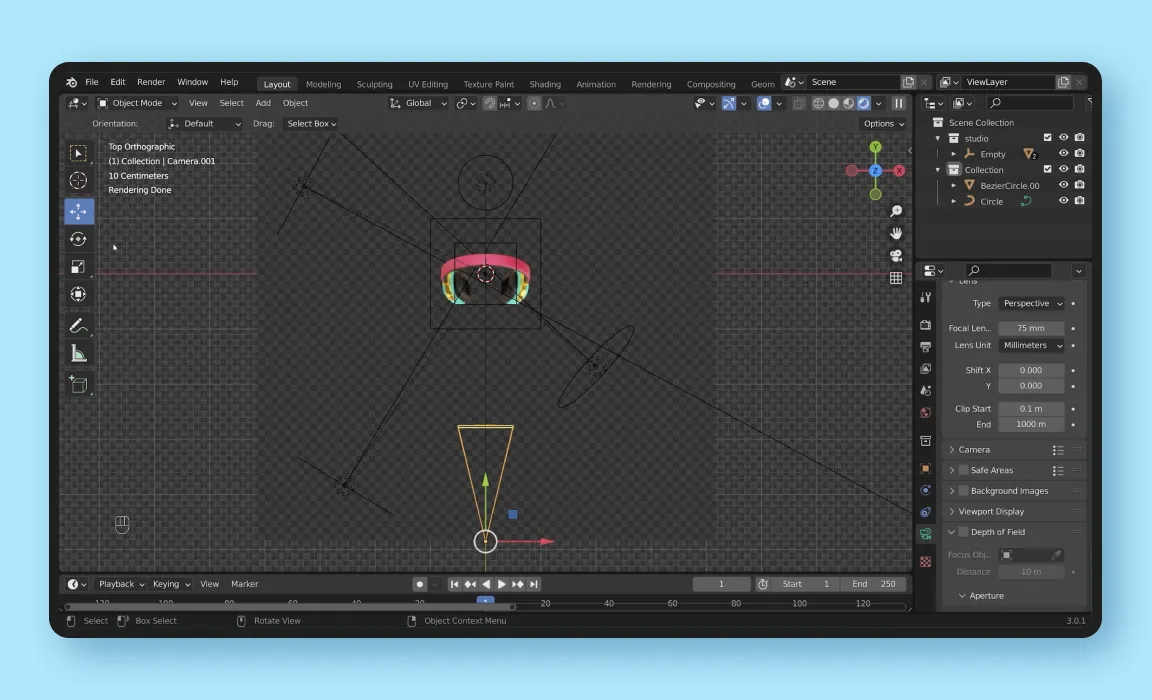
There are multiple ways to change the camera angle. The most straightforward way is to simply move the camera.
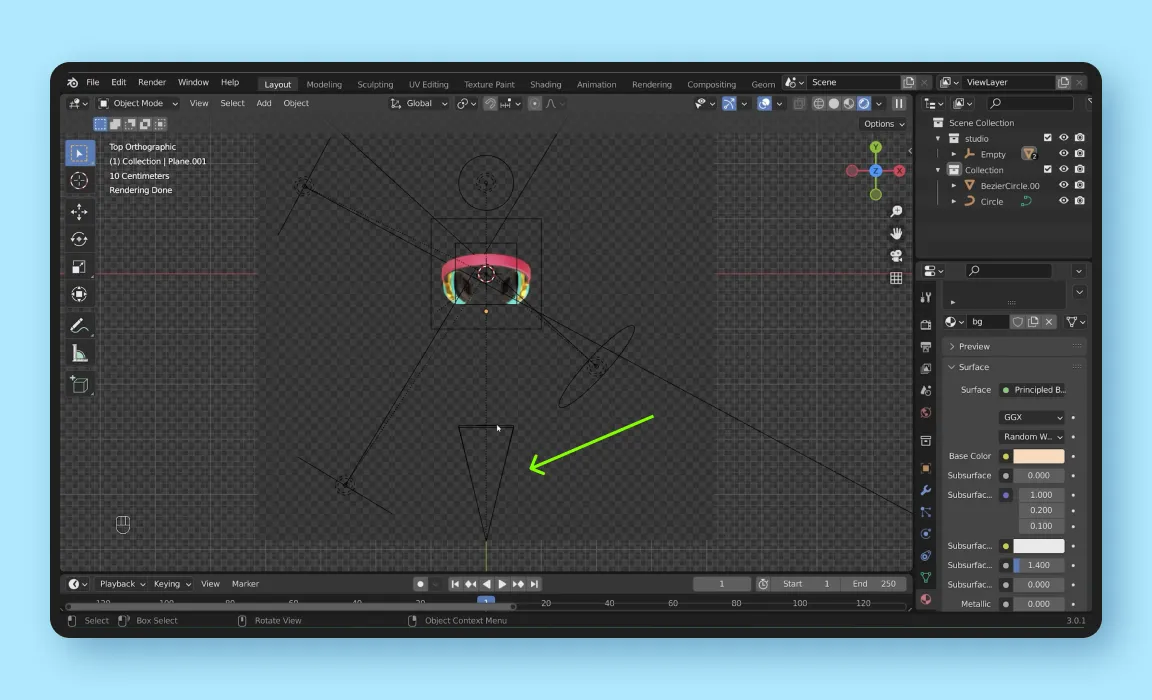
To find out where the camera is positioned, press 7 to view your scene from the top. This triangle in the scene represents your camera.
Here’s how to move the camera:
Moving the camera directly is straightforward, but it’s not always the best option. It’s hard to align the camera to the exact composition you want.
So instead, we’re first going to view our object through the lens of our camera, then adjust the position of the camera. This is similar to how you photograph an object in real life – you wouldn’t just move the camera and take a photograph, but use the viewfinder to get the right composition, then take a picture. Here’s how:
You’ll see a red dashed border appear around your composition. This means that you are now viewing the object through the lens of the camera.
Disabling Camera to View is an important step. If you skip this, your camera will remain active – your view will keep changing if you move in the viewport.
That’s it! You can finally render the image, using the same steps in part one of this tutorial.
As you can see, it’s really simple to customize 3D illustrations from IconScout. This opens up a whole new world of design assets you can use, as you can now make these illustrations fit your brand or design aesthetic. Stay tuned for more tutorials, as we explore how you can use Blender to create 3D graphic design compositions.